部署 Sentry 日志聚合服务
介绍
Sentry 是一个实时事件日志记录和汇集的平台。其专注于错误监控以及提取一切事后处理所需信息而不依赖于麻烦的用户反馈。它分为客户端和服务端,客户端(目前客户端有Python, PHP,C#, Ruby等多种语言)就嵌入在你的应用程序中间,程序出现异常就向服务端发送消息,服务端将消息记录到数据库中并提供一个web页方便查看。Sentry由python编写,源码开放,性能卓越,易于扩展,目前著名的用户有Disqus, Path, mozilla, Pinterest等。
搭建Sentry服务 (Docker)
首先,先从github拉取项目数据
git clone https://github.com/getsentry/onpremise.git第二步,进入clone的项目目录
cd onpremise第三步,创建相关数据目录
mkdir -p data/{sentry,postgres}第四步,获取项目Key
docker-compose run --rm web config generate-secret-key 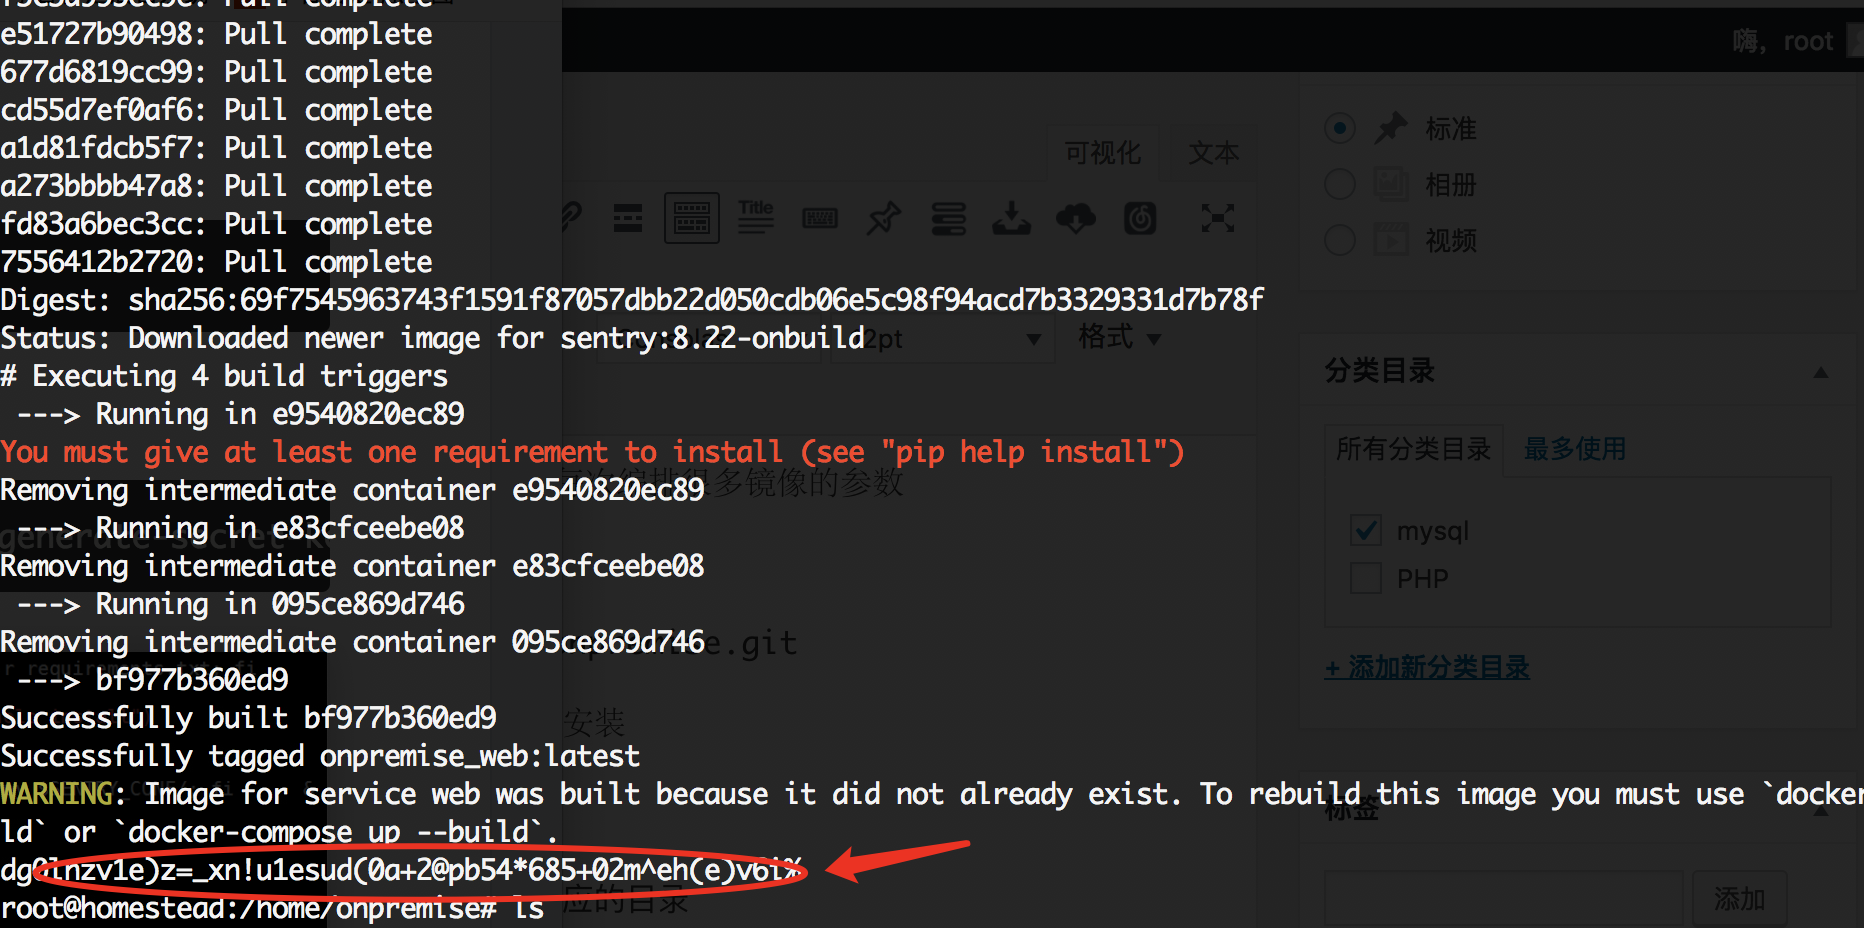
第五步,把刚才的哪个东西复制一下并且创建.env文件塞进去
# Run `docker-compose run web config generate-secret-key`
# to get the SENTRY_SECRET_KEY value.
SENTRY_SECRET_KEY=(刚才的密匙)
第六步,更新项目数据(重要),不更新会导致docker镜像启动不了。。。
docker-compose build --pull # Build the services again after updating, and make sure we're up to date on patch version
docker-compose run --rm web upgrade # Run new migrations
docker-compose up -d # Recreate the services
第七步,完成安装
接下来你只需要访问http://你的域名:9000 即可访问Sentry系统
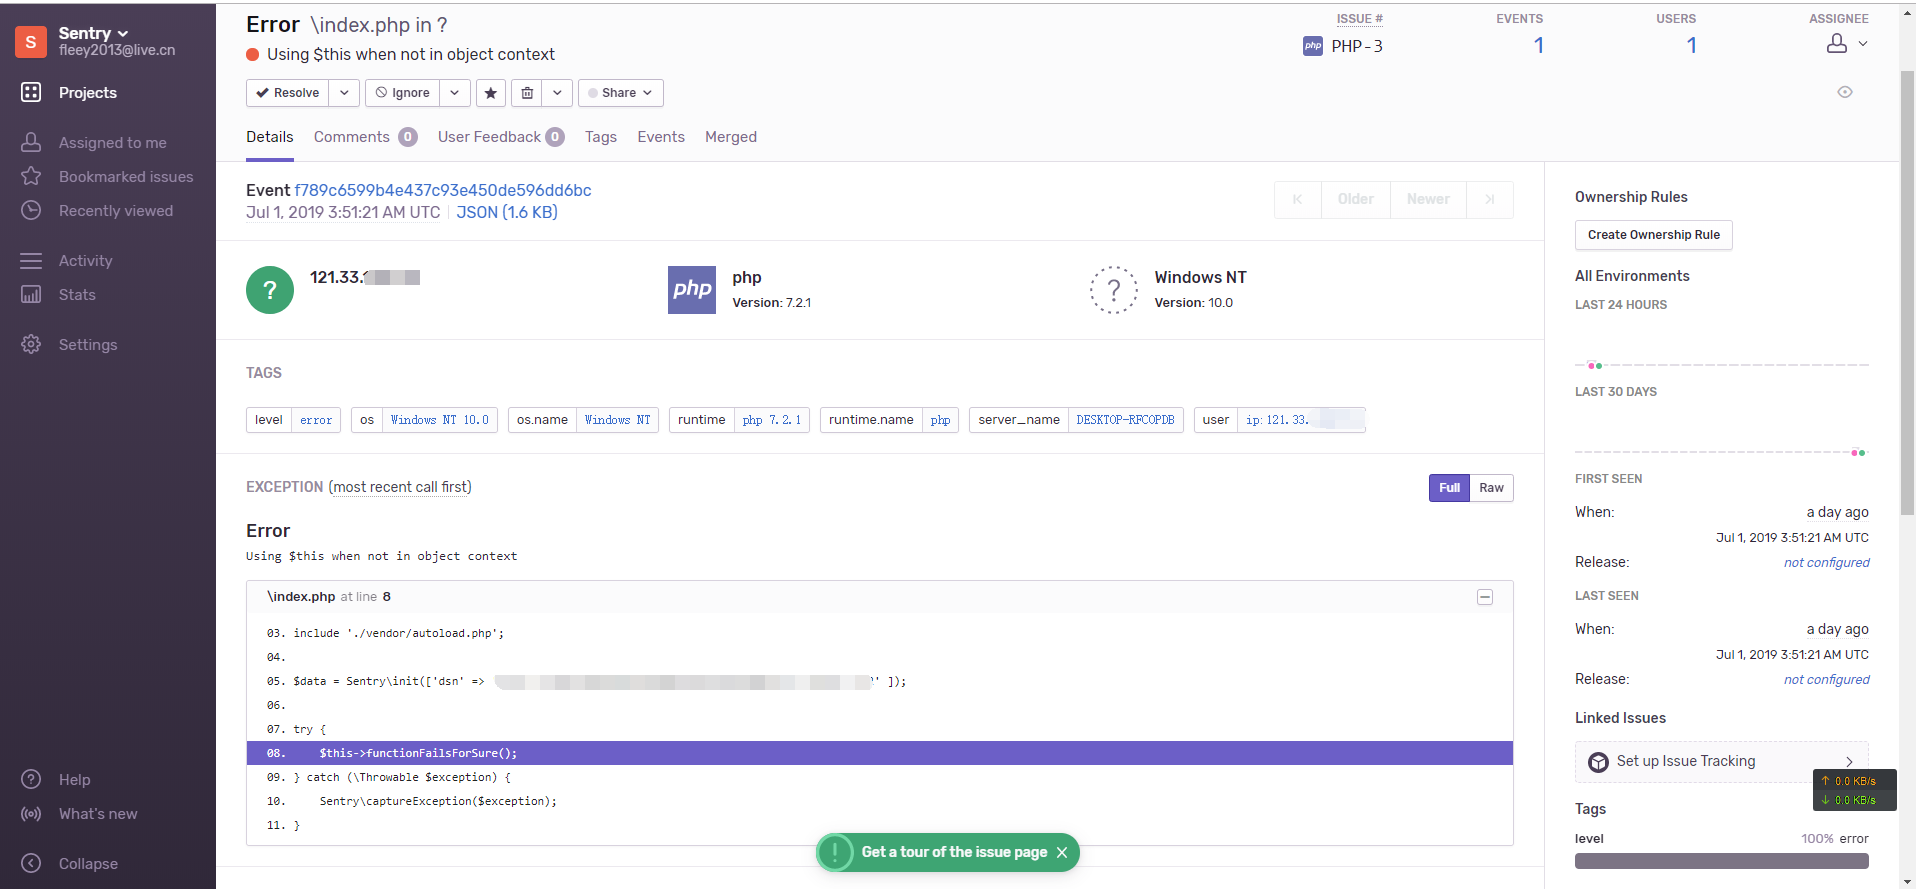
PHP 使用例子
先进行安装类库
composer require "sentry/sentry"index.php
<?php

include './vendor/autoload.php';

$data = Sentry\init(['dsn' => '项目DSN' ]);

try {
    $this->functionFailsForSure();
} catch (\Throwable $exception) {
    Sentry\captureException($exception);
}
然后你访问index.php之后应该会收到错误信息在Sentry里面